- No products in the cart.
16
Nov
Are you tired of searching for the perfect lip gloss with the ideal texture, color, and scent? Why not create your own personalized lip gloss at home? Making your own lip gloss is not only enjoyable and creative, but you can also control the ingredients, ensuring a natural, nourishing, and safe product. In this ultimate guide on how to make lip gloss, you will learn everything you need to know about making lip gloss at home, from essential ingredients and natural colorants to step-by-step instructions and customization ideas. Let’s embark on this exciting DIY journey together!
Key Takeaways
-
Create personalized, nourishing and hydrating lip gloss with natural ingredients for a safe, creative experience.
-
Experiment with different waxes to get the perfect texture and flavor your creation using essential oils or concentrated candy flavors.
-
Enjoy vibrant hues and shimmery sparkles while expressing yourself through themed lip gloss creations!
 The Benefits of DIY Lip Gloss
There are many advantages to making your own lip gloss at home, which might lead you to question why you haven’t attempted it before. One of the most significant advantages is that you can avoid toxic ingredients often found in commercial products by following a homemade lip gloss recipe. Moreover, you can explore a variety of colors and scents to personalize your natural lip gloss to your liking, making it truly unique.
One more advantage of crafting your own lip gloss at home is the possible savings on costs. By purchasing lip gloss containers and ingredients in bulk, you can create multiple lip glosses for a fraction of the price of store-bought products. Plus, homemade lip gloss makes a perfect gift for friends and family who will appreciate the time and effort you put into crafting a personalized, natural product.
Essential Ingredients for Homemade Lip Gloss
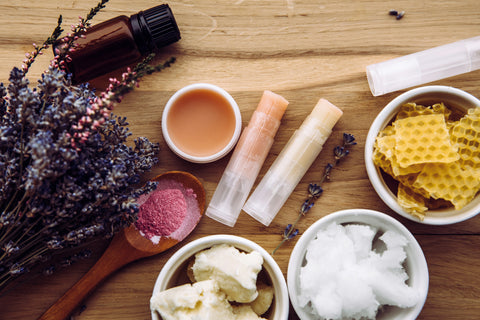
To make a fabulous homemade lip gloss, you’ll need a few essential ingredients that will help you make lip gloss with ease, such as:
-
Carrier oils
-
Wax
-
Essential oils or Candy Flavorings
-
Vitamin E
Each ingredient plays a vital role in creating a nourishing and hydrating lip gloss that will make your lips look and feel fantastic.
In the upcoming sections, we’ll detail each ingredient further and talk about their distinct benefits and properties.
Carrier Oils
Carrier oils are natural oils derived from plants that are incredibly beneficial for homemade lip gloss. They help the lip gloss glide smoothly across the lips and provide nourishing and moisturizing benefits. Popular carrier oils used in lip gloss include:
-
Castor oil: provides a beautiful glossy finish and glides luxuriously across the skin
-
Coconut oil: offers a beautiful high-shine, slowly penetrates the skin for ultimate softness, and is gentle enough for even the most sensitive areas
-
Olive oil: provides nourishment and hydration to the lips
These carrier oils, including sweet almond oil, are excellent choices for creating your own homemade lip gloss.
Olive oil is another great option for homemade lip gloss with numerous benefits. Here are some reasons why:
-
It is incredibly moisturizing and nourishing for the lips, thanks to its fatty acids and antioxidants.
-
It has healing properties that can soothe and repair cracked or chapped lips.
-
It is a natural ingredient, free from harsh chemicals and additives.
-
It is packed with vitamins like vitamin E, which helps nourish the skin.
Overall, incorporating olive oil and shea butter in homemade lip gloss provides excellent hydration, healing benefits, and a natural substitute for commercial lip products that often contain petroleum jelly.
Wax Options
Wax is an essential ingredient in homemade lip gloss, as it helps create the desired consistency and adds protective properties. Some options for wax in DIY lip gloss include:
-
Beeswax: commonly used in lip gloss recipes, it enriches the gloss and gives it durability while soothing the lips and creating a protective shield against the elements.
-
Soy wax: a vegan-friendly alternative to beeswax, it provides similar properties and can be used in lip gloss recipes.
-
Candelilla wax: another vegan-friendly option, candelilla wax is derived from the candelilla plant and can be used as a substitute for beeswax in DIY lip gloss.
These waxes can be used to create a variety of lip gloss recipes to suit your preferences and needs.
You can also prepare a DIY lip gloss without wax, leading to a more fluid consistency. By experimenting with different wax options, you can create a lip gloss with the perfect texture and consistency to suit your preferences. Whether you prefer a firmer lipgloss or a more liquid one, the choice is yours.
Flavoring with Essential Oils
Essential oils are incredibly powerful plant extracts that can be used to enhance the flavor and aroma of your lip gloss. With a wide variety of essential oils and flavorings available, you can choose your favorite scents to create a truly personalized lip gloss experience. Some popular essential oils for lip gloss include:
-
lavender
-
oregano
-
clove
-
cinnamon
-
thyme
-
ginger
When using essential oils or candy flavoring to flavor lip gloss, it’s important to be aware of safety precautions. The recommended amount of essential oil to flavor lip gloss is typically 1-3%, which is sure to give your lip gloss a delightful flavor. Always perform a patch test before using essential oils on your lips to ensure there are no adverse reactions.
Adhering to these guidelines can help you craft a wonderfully fragranced lip gloss that is safe and pleasurable to use.
Flavoring with Concentrated Candy Flavors
Concentrated candy flavors are highly concentrated flavoring oils that provide a powerful and unique scent and flavor to lip gloss. Some of the most popular concentrated candy flavors used in DIY lip gloss include:
-
Cotton candy
-
Bubble gum
-
Blue raspberry
-
Pink sunburst
-
Candy cane
-
Sour green apple
- Strawberry Candy Flavoring
Other delightful flavors include blueberry, strawberry, vanilla, and pineapple.
To ensure a delightful taste when using concentrated candy flavors, it’s important to find the right balance between the flavoring and other ingredients. Here are some tips to help you achieve the perfect balance:
-
Start by using a small amount of the concentrated candy flavor and gradually increase it until you achieve the desired taste.
-
It may take some trial and error to find the perfect balance, but it is worth the effort!
-
Consider using flavoring oils instead of flavoring liquids for a more concentrated and potent flavor.
Essential Oils & Vitamin E
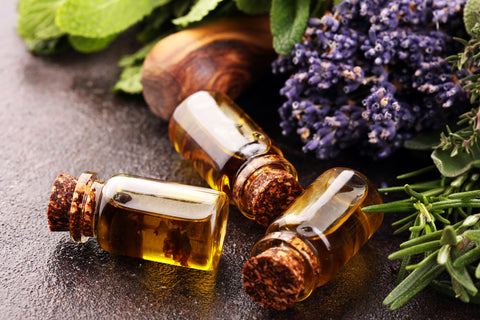
Adding essential oils and vitamin E to homemade lip gloss not only infuses delightful scents and flavors, but also provides nourishment and protection for your lips. Vitamin E oil acts as an antioxidant, helping preserve the lip gloss for longer, while essential oils provide various benefits, such as personalization, moisturization, healing qualities, aromatherapy, and the utilization of natural ingredients.
There is no specific recommended amount of vitamin E to include in homemade lip gloss, but it is typically added in a few drops or teaspoons, depending on the recipe and personal preference. Experimentation with varying quantities of essential oils and vitamin E can be an enjoyable method to tailor your lip gloss and create the ideal nourishing mix for your lips.
Natural Colorants for DIY Lip Gloss
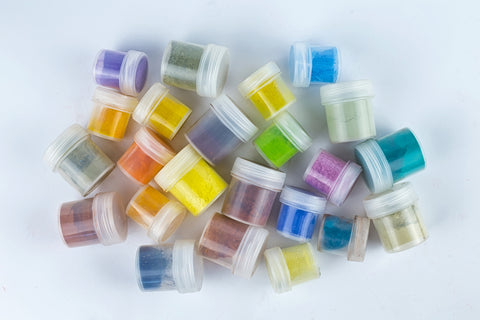
Adding color to your homemade lip gloss is a creative and exciting part of the process. Natural colorants, such as beetroot powder, hibiscus, and cocoa powder, can help you achieve a variety of stunning shades while keeping your lip gloss safe and chemical-free.
In the upcoming sections, we’ll examine the options for creating bright colors and introducing shimmer and glitter to your lip gloss using natural ingredients.
Vibrant Hues
Creating vibrant colors in your homemade lip gloss is easy with natural ingredients and techniques. Some examples include:
-
Beetroot powder: Mix it with the lip gloss base or dissolve it in vegetable glycerin to add a beautiful pink hue, creating stunning shades ranging from light pink to deep red.
-
Hibiscus powder: Use it as a natural colorant to create vibrant shades of pink and red.
-
Cocoa powder: Add it to your lip gloss base for a rich, chocolatey color.
-
Various clays, herbs, and root powders: Experiment with different natural ingredients to create a wide range of beautiful colors for your lip gloss.
To attain the ideal color intensity, try different concentrations of natural colorants in your lip gloss. Generally, higher concentrations of colorants result in more vivid and vibrant shades, while lower concentrations may create softer and lighter shades. Have fun playing with different colors and combinations to create a truly personalized lip gloss that reflects your unique style and preferences.
Adding Shimmer and Sparkle
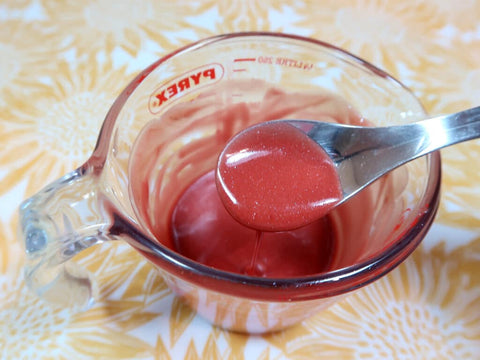
Introducing shimmer and glitter to your lip gloss can transform it from merely attractive to genuinely stunning. By using natural and skin-safe ingredients like gold glitter mica, rose mica, or food source pigments like cocoa powder, hibiscus powder, or beetroot powder, you can create a stunning shimmer in your homemade lip gloss.
If you prefer a more glittery look, you can find cosmetic-grade edible glitter to add some sparkle to your lip gloss. Be sure to avoid using craft glitter, as it is not specifically designed for use on the skin and may cause irritation. Experiment with different levels of shimmer and sparkle to create a lip gloss that catches the light and makes your lips truly shine.
Step-by-Step Guide to Making Lip Gloss
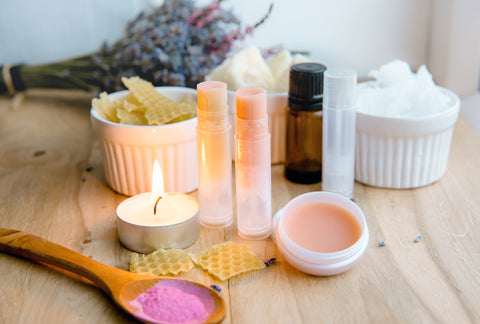
Having gained a deeper understanding of the crucial ingredients, colors, and customizations for homemade lip gloss, it’s time to learn how to assemble it all. In the upcoming sections, we’ll provide a step-by-step guide on crafting lip gloss, which includes selecting the appropriate container and offering tips for success.
Choosing the Right Container
The perfect container for your homemade lip gloss not only keeps your lip gloss fresh and protected but also makes it easy and enjoyable to use. Some great container options for storing homemade lip gloss include lip gloss tubes, squeezable lip gloss containers, or small lip balm containers. When choosing a container, consider factors such as ease of application, portability, and aesthetics.
Lip gloss containers come in various options, including:
-
Lip gloss tubes with a built-in applicator: convenient and easy to use
-
Squeezable lip gloss containers: allow for precise control over the amount of product dispensed
-
Small lip balm containers: perfect for a firmer lip gloss that can be applied with a finger or lip brush
Experiment with different container options to find the one that best suits your lip gloss formulation and personal preferences.
Tips for Success
Creating lip gloss at home can be a delightful and fulfilling endeavor, but it’s important to adhere to some useful tips for success. Here are some tips to keep in mind:
-
Work efficiently when mixing your ingredients, as some components, such as wax, may solidify quickly as they cool.
-
Be sure to use all-natural ingredients for a safer and healthier lip gloss.
-
Properly label the ingredients and containers to avoid confusion and ensure you’re always using the correct products.
When it comes to storing your homemade lip gloss, follow these guidelines:
-
Keep it at room temperature, between 68°F and 77°F (20°C and 25°C)
-
Store it in a cool, dark place
-
Use an airtight container to maintain its quality and texture
By following these storage tips, your homemade lip gloss will not only look and feel fantastic but also last long enough for you to enjoy its benefits.
Customizing Your Lip Gloss
Tailoring your lip gloss guarantees a unique and personalized product designed to your liking. Whether you prefer vegan and allergy-friendly options or want to create themed lip glosses for special occasions or gifts, the possibilities are endless.
In the upcoming sections, we’ll examine a variety of customization options to assist you in creating the ideal lip gloss for yourself or your loved ones.
Vegan and Allergy-Friendly Options
For those who prefer vegan or allergy-friendly ingredients in their homemade lip gloss, there are plenty of alternatives available. Candelilla wax, soy wax, and kokum butter are excellent vegan alternatives for homemade lip gloss ingredients. Moreover, to ensure your lip gloss is nut-free, avoid using ingredients like almond oil or any other nut-derived oils and opt for cocoa butter, coconut oil, olive oil, and beeswax as base ingredients instead.
Creating a delicious gluten-free homemade lip gloss is also possible by using ingredients like cocoa butter, beeswax, and almond oil. Be sure to check the ingredients of any flavorings or colorings you add to ensure they are gluten-free. By exploring various vegan and allergy-friendly alternatives, you can create a lip gloss that suits your needs and preferences while still providing beautiful color, scent, and nourishment for your lips.
Creating Themed Lip Glosses
Themed lip glosses are a fun and creative way to celebrate holidays, parties, or give personalized gifts. With endless possibilities, you can create lip glosses that perfectly match the theme or occasion, including clear lip gloss for a simple and versatile option.
For a Christmas-themed lip gloss, try:
-
Using festive colors like red or green food coloring
-
Adding peppermint or cinnamon essential oil for a delightful holiday scent
-
Adding shimmer or glitter to create a festive touch
Some other exciting ideas for themed lip glosses include:
-
Candy-themed lip gloss
-
Lavender stardust lip gloss
-
Disney-themed lip gloss
-
Lip glosses inspired by different colors or seasons
By experimenting with different colors, flavors, and packaging, you can create unique and memorable themed lip glosses that are perfect for any occasion or as thoughtful, personalized gifts.
How to Apply and Store Homemade Lip Gloss
The application of homemade lip gloss is uncomplicated and direct. Here’s how to apply it:
-
Use a clean lip brush or your finger to delicately apply a thin layer of the lip gloss onto your lips.
-
Begin from the center of your lips and blend it outwards for a beautiful, even application.
-
With your homemade lip gloss, you can confidently flaunt your unique creation and enjoy the nourishing benefits it provides.
Regarding storage, homemade lip gloss ought to be stored at room temperature, between 68°F and 77°F (20°C and 25°C), in a cool, dark place, and within an airtight container. This will help maintain its quality and texture, ensuring that you can enjoy your lip gloss for up to six months. By properly applying and storing your homemade lip gloss, you’ll maximize its benefits and longevity, allowing you to fully enjoy your creation.
Summary
In this ultimate guide, we’ve explored the benefits of making your own lip gloss, essential ingredients, natural colorants, and customization options. With step-by-step instructions and helpful tips for success, you now have the knowledge and tools to create your unique and personalized lip gloss. Whether you’re crafting a thoughtful gift for a friend or looking for a natural and nourishing alternative to store-bought products, homemade lip gloss is a fun and rewarding DIY project that lets you unleash your creativity and passion for beauty. So why wait? Start crafting your perfect lip gloss today!
Frequently Asked Questions
How do you make lip gloss at home?
Making homemade lip gloss is quick and easy! Simply mix 2 tablespoons of Vaseline with a teaspoon of lipstick, a bit of blush or beet root powder for color, and a few drops of essential oil for scent. Melt the mixture in the microwave for 10-30 seconds and stir well before pouring into your lip gloss tube or small container.
What ingredients go into lip gloss?
Lip gloss contains emollients such as lanolin, castor oil, jojoba oil, polybutene, and vitamin E, giving it a shiny texture that everyone loves. Enjoy your gorgeous glossy lips!
What is three ingredient lip gloss?
Make your own three ingredient lip gloss with beeswax, almond oil and essential oils. You can get creative with the scent and color for a personalized pampering experience!
How do you make your own lip gloss line?
Creating your own lip gloss line is possible with the right plan: create a logo, determine your budget, choose a tube, colors and finish, and decide on a box design. Start designing your lip gloss today and you'll soon have your own product line!
What are some popular carrier oils for homemade lip gloss?
Using carrier oils like olive oil, coconut oil, sweet almond oil, avocado oil, jojoba oil and grapeseed oil for homemade lip gloss is an excellent way to get creative with beauty products!
